Creating a custom CLI command in Magento 2 can significantly improve your development process. Whether you’re automating admin tasks or extending functionality, using the command-line interface makes your work faster and more modular. This tutorial explains how to create a CLI command in Magento 2 using best practices.
Why Magento 2 Custom CLI Commands Are Useful
Magento 2 comes with many built-in commands, but sometimes your business needs go beyond the default features. Writing your own CLI command allows you to trigger logic directly from the terminal—perfect for automating backups, data syncs, or triggering custom workflows.
Magento 2 Module Structure for CLI Commands
To build a Magento 2 CLI command, your custom module should follow this directory structure in app/code/Magencode/MyModule:
├── Console
│   └── Command
│       └── Backup.php
├── etc
│   ├── di.xml
│   └── module.xml
└── registration.php
This structure allows Magento to recognize and load your command properly.
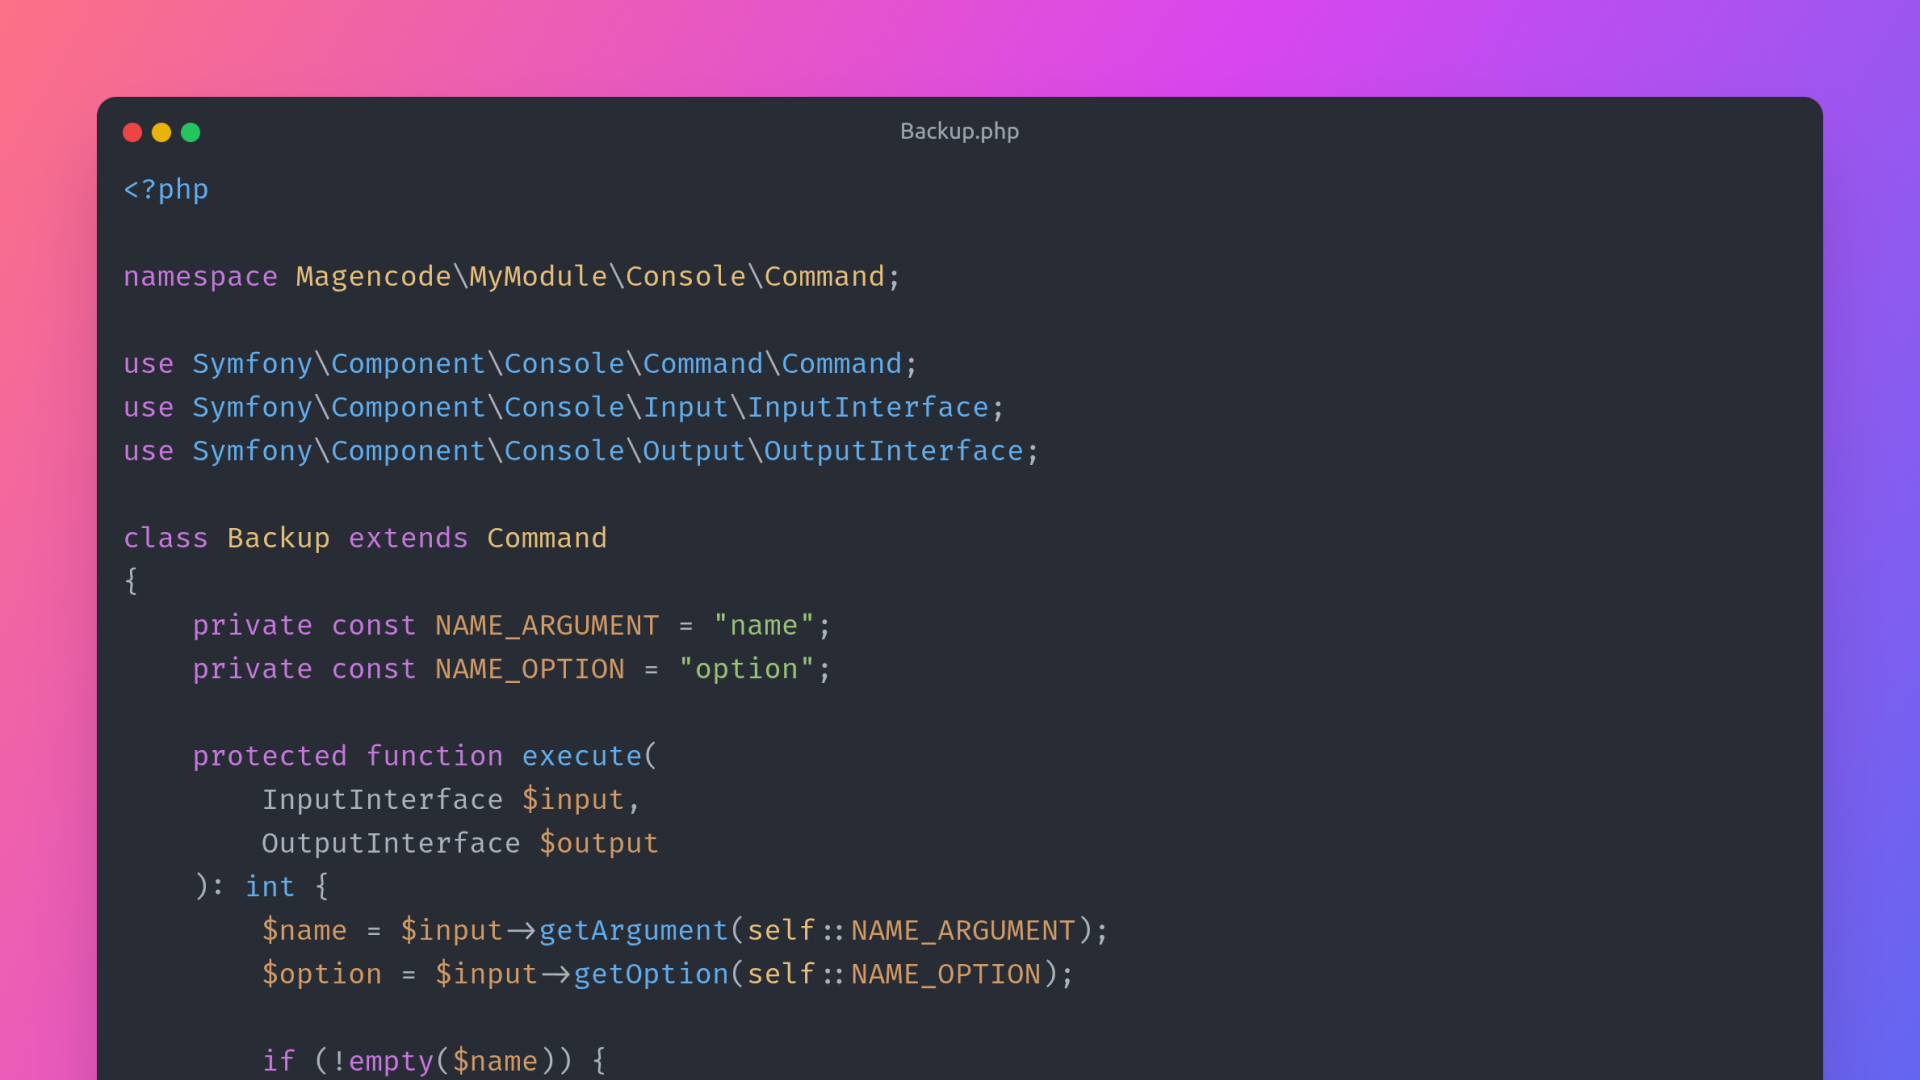
Defining the Command Logic for the Terminal
The main class is placed inside the Console/Command folder. The file Backup.php defines your command name, description, and what it does when executed.
<?php
/**
 * Copyright © Magencode 2025 All rights reserved.
 * See COPYING.txt for license details.
 */

declare(strict_types=1);

namespace Magencode\MyModule\Console\Command;

use Symfony\Component\Console\Command\Command;
use Symfony\Component\Console\Input\InputArgument;
use Symfony\Component\Console\Input\InputInterface;
use Symfony\Component\Console\Input\InputOption;
use Symfony\Component\Console\Output\OutputInterface;

class Backup extends Command
{

    private const NAME_ARGUMENT = "name";
    private const NAME_OPTION = "option";

    /**
     * @inheritdoc
     */
    protected function execute(
        InputInterface $input,
        OutputInterface $output
    ): int {
        $name = $input->getArgument(self::NAME_ARGUMENT);
        $option = $input->getOption(self::NAME_OPTION);

        if (!empty($name)) {
            $output->writeln("Hello " . $name);
        } else {
            $output->writeln("Hello World!");
        }

        return Command::SUCCESS;
    }

    /**
     * @inheritdoc
     */
    protected function configure(): void
    {
        $this->setName("magencode:backup");
        $this->setDescription("Backup CLI command description");
        $this->setDefinition([
            new InputArgument(self::NAME_ARGUMENT, InputArgument::OPTIONAL, "Name"),
            new InputOption(self::NAME_OPTION, "-a", InputOption::VALUE_NONE, "Option functionality")
        ]);
        parent::configure();
    }
}
Registering the Command with Dependency Injection
The dependency injection configuration file (etc/di.xml) registers your CLI class so Magento can load it when executing commands.
<?xml version="1.0" ?>
<config xmlns:xsi="http://www.w3.org/2001/XMLSchema-instance" xsi:noNamespaceSchemaLocation="urn:magento:framework:ObjectManager/etc/config.xsd">
	<type name="Magento\Framework\Console\CommandList">
		<arguments>
			<argument name="commands" xsi:type="array">
				<item name="Backup" xsi:type="object">Magencode\MyModule\Console\Command\Backup</item>
			</argument>
		</arguments>
	</type>
</config>
Declaring the Module to Magento
The module declaration file (etc/module.xml) is required to tell Magento your module exists, along with its version number.
<?xml version="1.0" ?>
<config xmlns:xsi="http://www.w3.org/2001/XMLSchema-instance" xsi:noNamespaceSchemaLocation="urn:magento:framework:Module/etc/module.xsd">
	<module name="Magencode_MyModule"/>
</config>
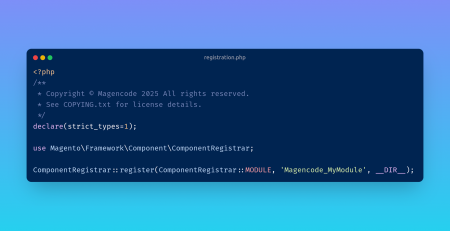
Registering the Module During System Initialization
The registration.php file is essential for Magento to register the module during system startup. It links the module to Magento’s autoloader.
<?php
/**
 * Copyright © Magencode 2025 All rights reserved.
 * See COPYING.txt for license details.
 */
declare(strict_types=1);

use Magento\Framework\Component\ComponentRegistrar;

ComponentRegistrar::register(ComponentRegistrar::MODULE, 'Magencode_MyModule', __DIR__);
How to Run Your Custom Command in Magento 2
Once the files are in place, activate your module and run your CLI command:
php bin/magento setup:upgrade
php bin/magento cache:clean
php bin/magento magencode:backup
You should see the command output confirming it executed.
Conclusion: Simplify Tasks with Magento 2 CLI Commands
Magento 2 custom CLI commands help automate your backend tasks directly from the terminal. With a structured module and proper configuration, you can boost development speed and reduce repetitive work in your eCommerce store.

Leave a Reply